
Nutanix Xi Frame Deployment Series: Part 1
Nutanix Frame:
Nutanix Xi Frame Desktop as A Service Platform Build for Cloud Deployments, having integration ith Azure, AWA, GOOGLE Cloud. But we can deploy Frame on-Prem on Nutanix AHV. In this Series I show the Nutanix Xi Frame Deployment on on-Prem Nutanix AHV.
Requirements:
- Nutanix Cluster Running with Acropolis Hypervisor with Prism Central 5.10 or newer
- Frame Agent and Cloud Connector Appliance (Download from here)
Cloud Connector Appliance can be downloaded automatically during deployment also - Xi Frame Subscription
STEPS:
- Create Golden Image
- Prepare Nutanix Cluster
- Connect to Xi Frame
Create Golden Image:
Now I will Install windows 10 & install Frame agent on it and then Sysprep the image.
Create VM on AHV:
Open Prim Element & Navigate to VM
Click Create VM to Create Virtual Machine

Assign VM Name, VCPU, RAM, Storage, Network and mount Windows 10 ISO , VertIO
Note: VertIO Is required to Install Window on AHV Hypervisor as Window 10 does have Nutanix ISCSI pass through Drivers
Click Save to Create the VM.
Power-On the Created VM.
Click Install to Proceed with installation

Click Install Now

Select Desire Language and keyboard options and Click Next

Select Operating System Version and Click Next
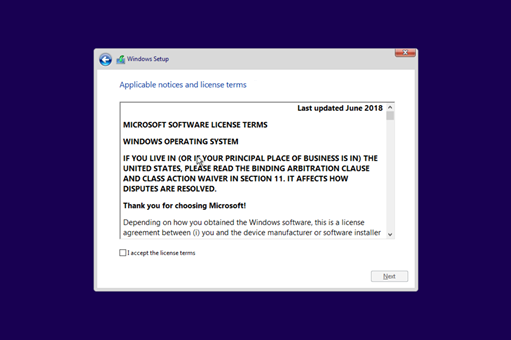
Accept the Agreement and Click Next
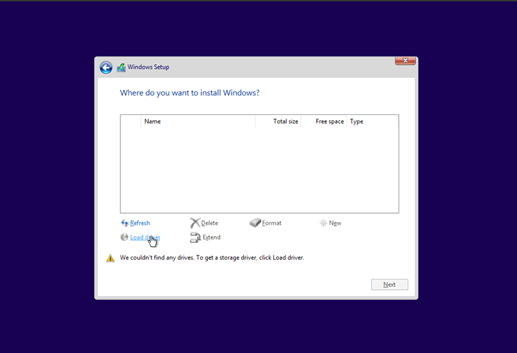
As Disk is not discovered, click load driver.
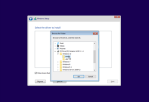
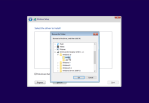
Browse Nutanix VertiIO ISO & Select the Driver as per Operating System Type. And click Ok

Select Nutanix VertiO SCSI Pass-through Controller and click next

Create Partition and click next to proceed with Windows Installation.


Once Windows Installation completed. Install VertiO Drivers.
Browse Mounted VertIO ISO and Run Setup.
Click Finish
Enable Remote Desktop and RDP to Virtual Machine for Frame Agent Installation.
Note: RDP to VM is requried, as once you install Frame Agent, VNC Console connection will be disconnected
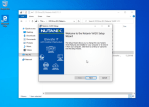
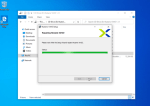
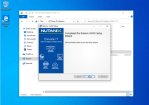
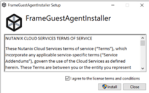
Copy Downloaded Frame Agent Installer to Virtual machines and Run it.
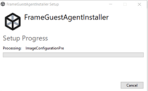

Click Restart to Restart the VM.
Once You done with Image configration, run the below Command from PowerShell as Administator
Start-Process -FilePath “C:WindowsSystem32SysprepSysprep.exe” -ArgumentList “/oobe /shutdown /generalize /unattend:C:ProgramDataFrameSysprepUnattend.xml” -Wait -NoNewWindow
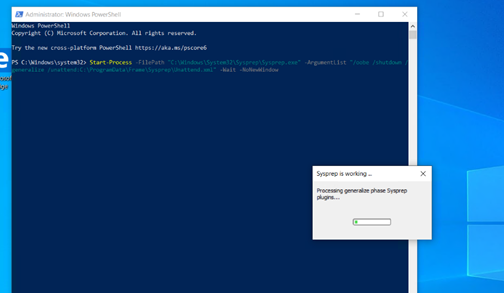
Virtual machine will be powered-off once Sysprep done.
Step 2: Prepare Nutanix Cluster
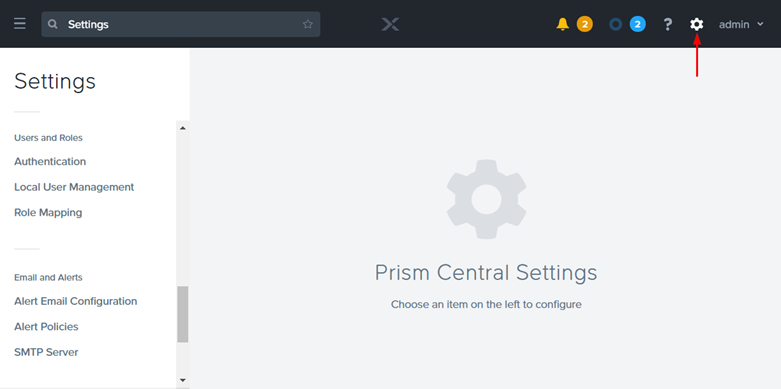
Open Nutanix Prism Central, open settings
Local user Management

Create new User: with prism Central admin & user admin permission.
Save your user name and password – you will need these later on in the process.
Click on the hamburger menu icon in the upper left portion of your Prism Central interface.
Expand the “Virtual Infrastructure” menu item and select “Categories.”
Click on the “New Category” button.
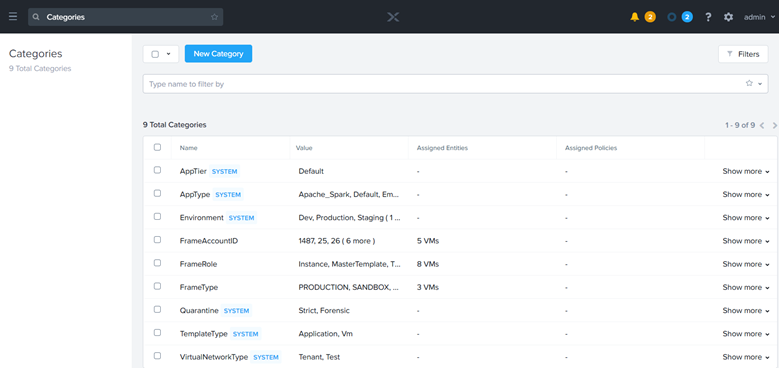
Fill in the form with the following values:
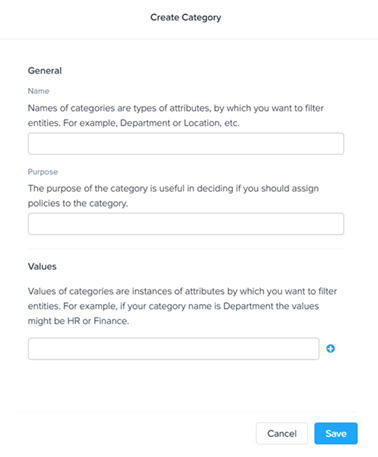
Name: FrameRole
Purpose: Create and Manage Frame Instances
Values: Instance, Template, and MasterTemplate (Add each value on separate lines using the plus symbol.)
Click “Save.”
From your home drop-down menu on the left, click “Settings.”
Under the “Setup” section of the “Settings” menu, click “Connect to Frame.”

On this page, specify the following:
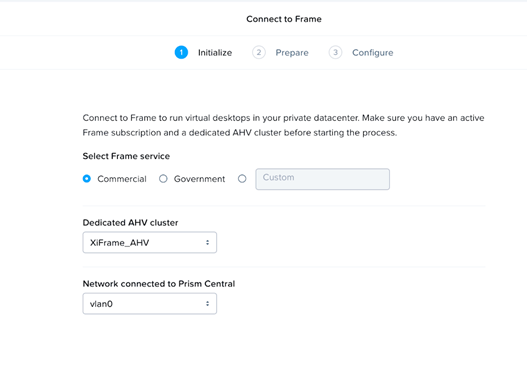
Select Frame Service: This is your Frame Service deployment type. Most organizations should select “Commercial” unless using a Frame GovCloud deployment.
Dedicated AHV cluster: Select the cluster where the CCA would be deployed from the drop-down menu.
Network connected to Prism Central: Specify the VLAN that will be used by this CCA from the drop-down menu.
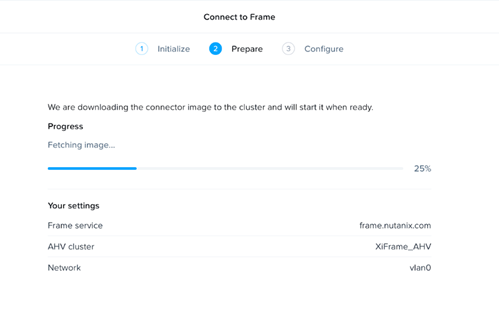
Click “Next.” The current image for CCA will be downloaded from Nutanix portal and deployed on the Nutanix cluster specified in the previous step. The progress can be monitored in the status bar. Once complete, click “Configure.”
Connect your AHV Cluster to Frame
Connecting your AHV cluster to Frame is the final task required to get Frame running on AHV.
NOTE: DHCP Is requried otherwise wizard will be stuck on 50% stage
Access the Frame Cloud Connector wizard by navigating to the CCA’s IP. For example https://192.168.2.X.
Login with the Prism Central account you have designated for Xi Frame and enter the Prism Central URL.
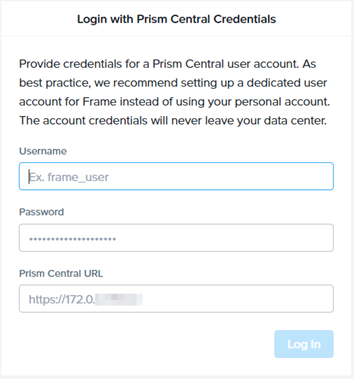
Provide the Service Account(you created eariler in Pirsm Central) information and Prism Central IP Address and click Login.
Select your cluster and network VLAN to host desktops and enter your desired cloud account name.

Note: To ensure a smooth setup, please make sure you are logged into your “My Nutanix” account in a separate tab in your browser window.
Define and add the VM instance types to use for your AHV-hosted Xi Frame account.

Check the box next to your golden master image VM template for the Sandbox template.

Click on the “OS” field listed next to your Sandbox template. Select your desired operating system. Click “Next” when you’re ready.
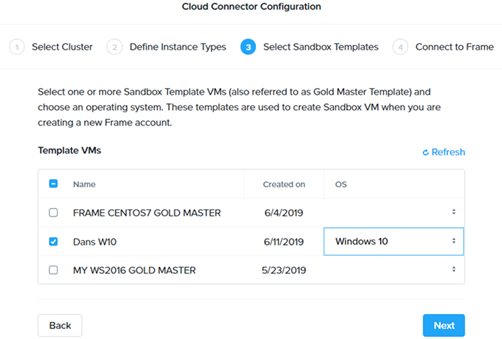
Select the Customer entity or Organization you created earlier in the Xi Frame account setup. Click “Finish.”

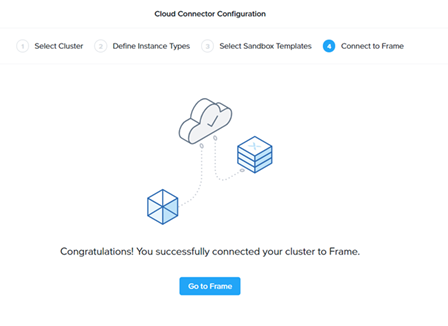
The wizard should inform you that your cluster has been connected successfully.
Note: Currently Configuration changes to cloud Connector appliance after its connects to Cluster is not possible, for changes need to contact Nutanix Support.
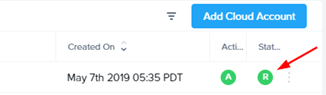
Log in to your Xi Frame account to check the cloud account creation status. The “C” status indicates that the account is still being created.
![]()
Note: If your account status hasn’t changed after an hour, please create a ticket through your MyNutanix support portal and provide your cloud account’s display name. You can locate the cloud account’s display name by navigating to the Organization or Customer entity’s “Cloud Accounts” tab.
The account status should change from “C” (Creating) to “R” (Ready).
Once the cloud account is ready, you can use your AHV infrastructure to create an account.
Ref: docs.frame.nutanix.com
