
Nutanix Metro is the Nutanix DR Implementation when Zero RPO is desired. Nutanix Metro is supported by VMware ESXi, Hyper Hypervisors.
Nutanix Metro Availability works on the policy applied on datastore. It achieves by pairing a storage container on local Storage container with a storage container in remote site. containers. When metro availability is enabled, everything in the active storage container is replicated synchronously to the remote storage container. Metro availability configurations can include VMs, but they cannot include volume groups.
Metro availability policies apply per storage container, so a cluster can be active for one datastore and standby for another.
Some of the considering before proceeding:
- There will be 2 Nutanix Clusters
- It is recommended both Clusters hosts managed by same vcenter.
- Less than 5ms latency between the 2 Sites.
- In case of automatic failover 3rd site is required to setup witness
Log in VCenter, Create VMware Cluster and add both cluster hosts.

You can see Both Cluster Nodes are joined under same VCenter & VMware Cluster. Set VMware Cluster Nutanix recommended configuration as below
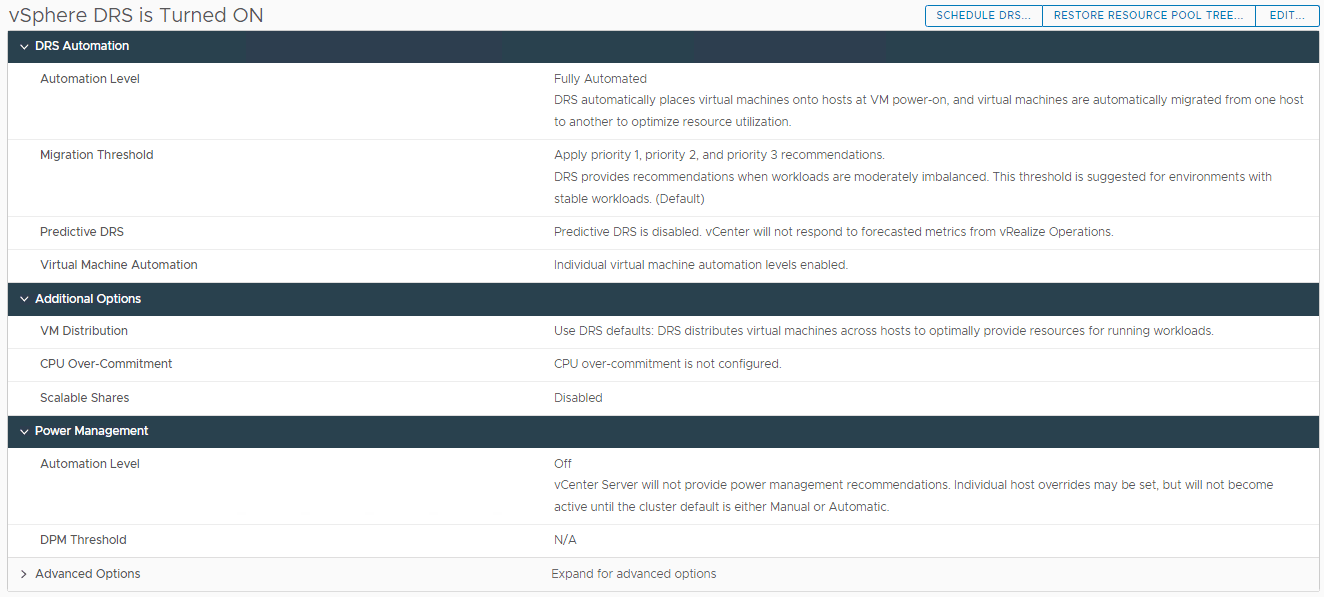
Enable DRS:
- DRS Automation
- Automation Level: Fully automated
- Migration threshold: 3
- Predictive DRS: Disabled
- Virtual Machine Automation: Enabled
- Additional Options
- All unchecked
- Power Management
- DPM: disabled
- Advanced Options
- All unchecked/empty
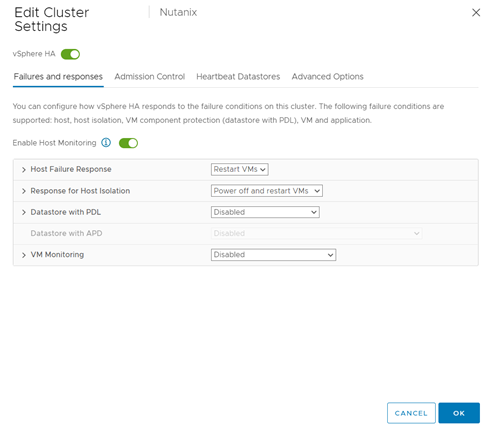
Enable HA:
- Failures and responses
- Enable Host Monitoring: Enabled
- Host failure response: Restart VMs
- Response for Host Isolation: Power off and restart VMs
- Datastore with PDL: Disabled
- Datastore with APD: Power off and restart VMs – Aggrassive restart policy
- Response Recovery: Disabled
- VM Monitoring: VM Monitoring Only
- Admission Control
- Host failures cluster tolerates: 1
- Heartbeat Datastores
- Select the two METRO datastores
- Advanced Options
- Leave empty/default
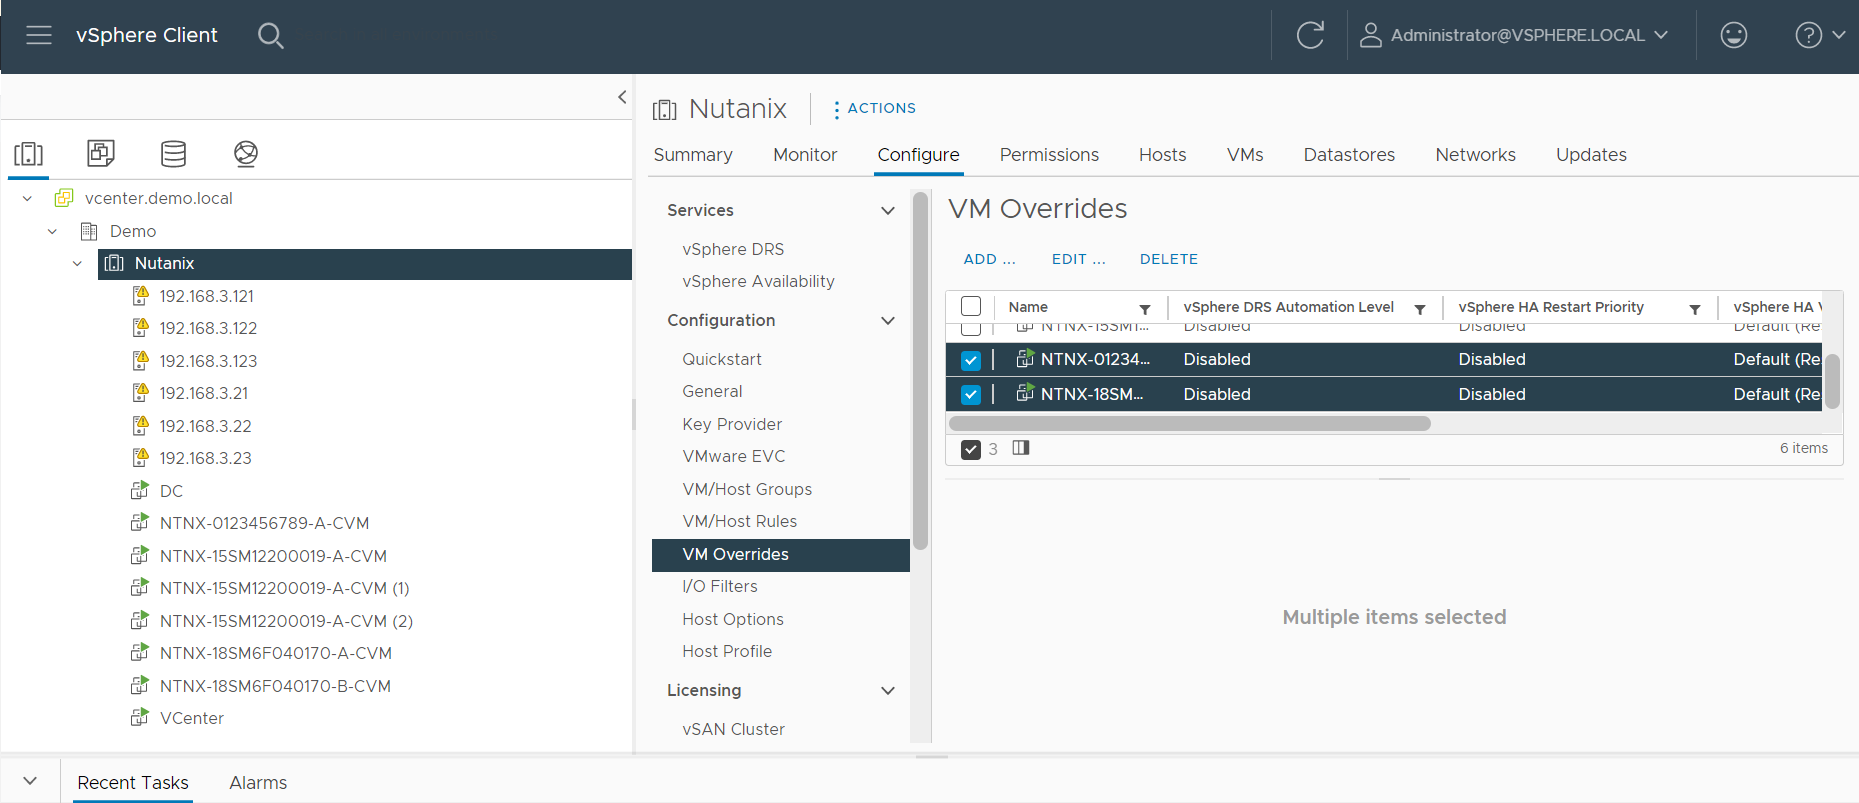
VM Override Setting:
Make sure to disable DRS and HA under VM Override Settings.
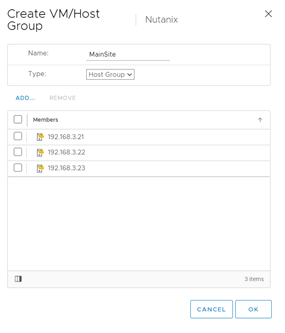
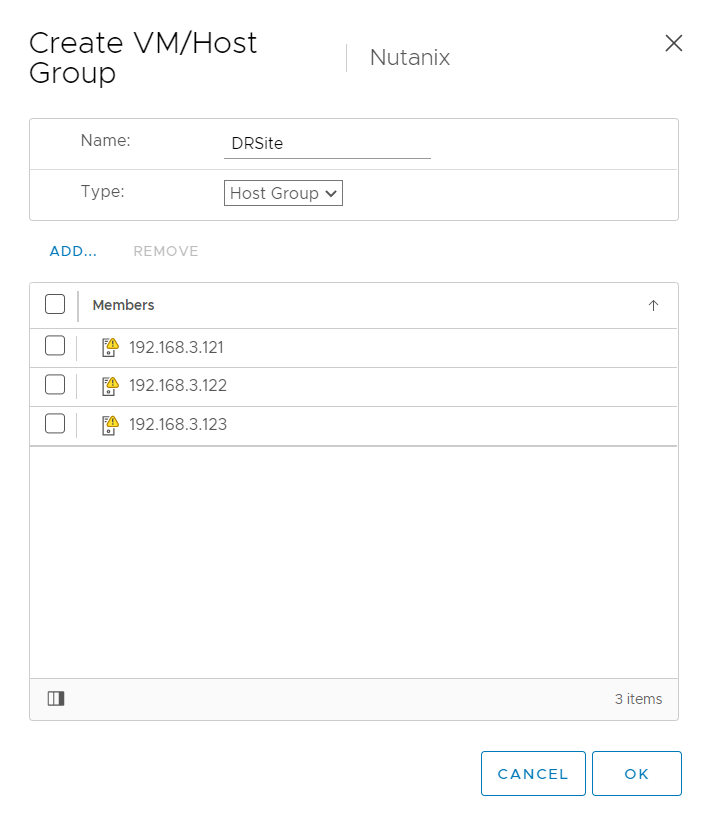
Create two Host Groups
1. Group A (Main-Site)
a. All the Main-Site Hosts
2. Group B (DR-Site)
a. All the DR-Site Hosts
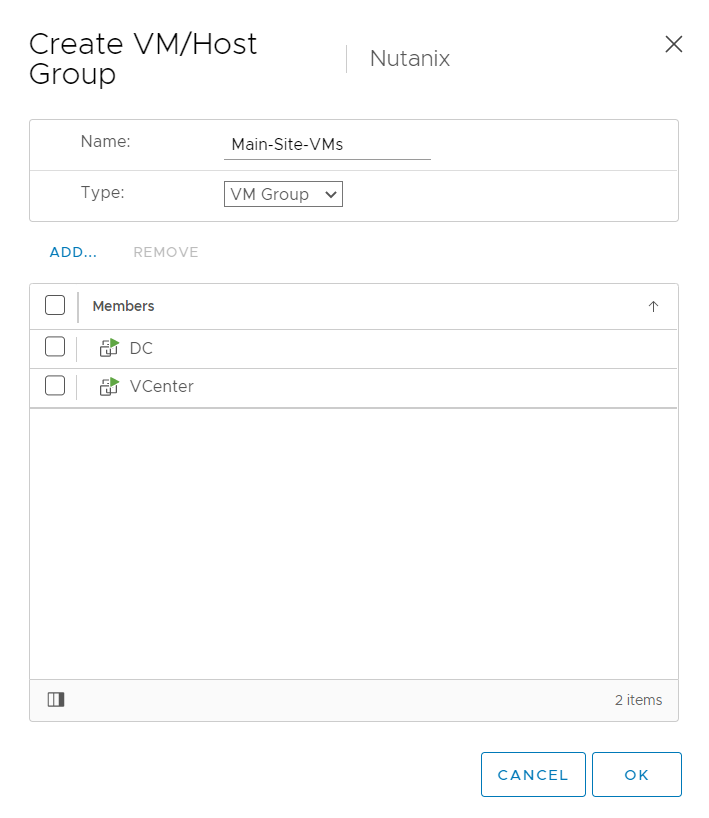
Create two VM Groups:
1. VMs on Main-Site
a. Add All the VMs which are on Main-site Cluster
2. VMs on DR-Site
a. Add all the VMs which are on DR-Site Cluster
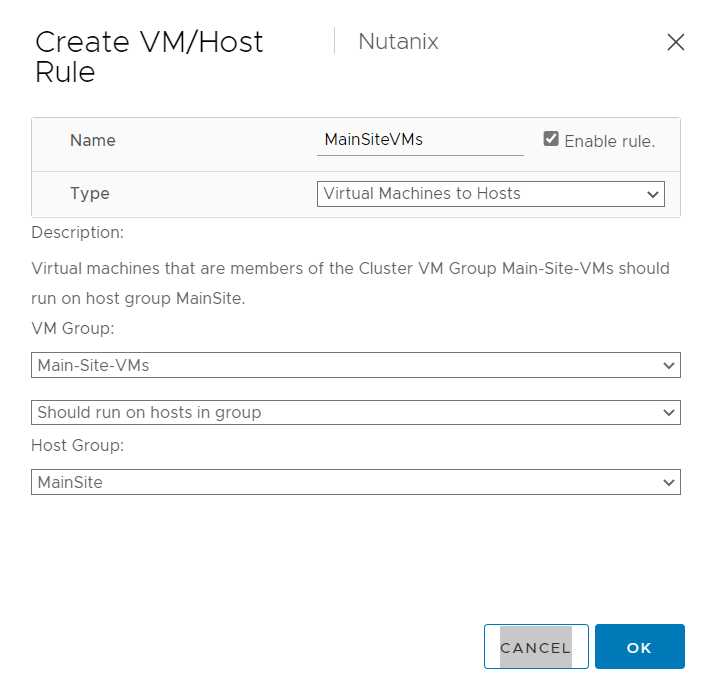
With the VM/Host Rules we will decided where the VM should run, and incase of failure they can run from other cluster.
Basically, you will create 2 rules
§ Mian Cluster, all main-site VMs should run from main Site so DRS will no move those VM to DR Hosts
§ DR Cluster, all DR-site VMs should run from DR Cluster so DRS will no move those VM to Main-Site Hosts
We are done with the VMware Configuration, lets proceed to Prism.
Navigate to Data Protection à Remote Site
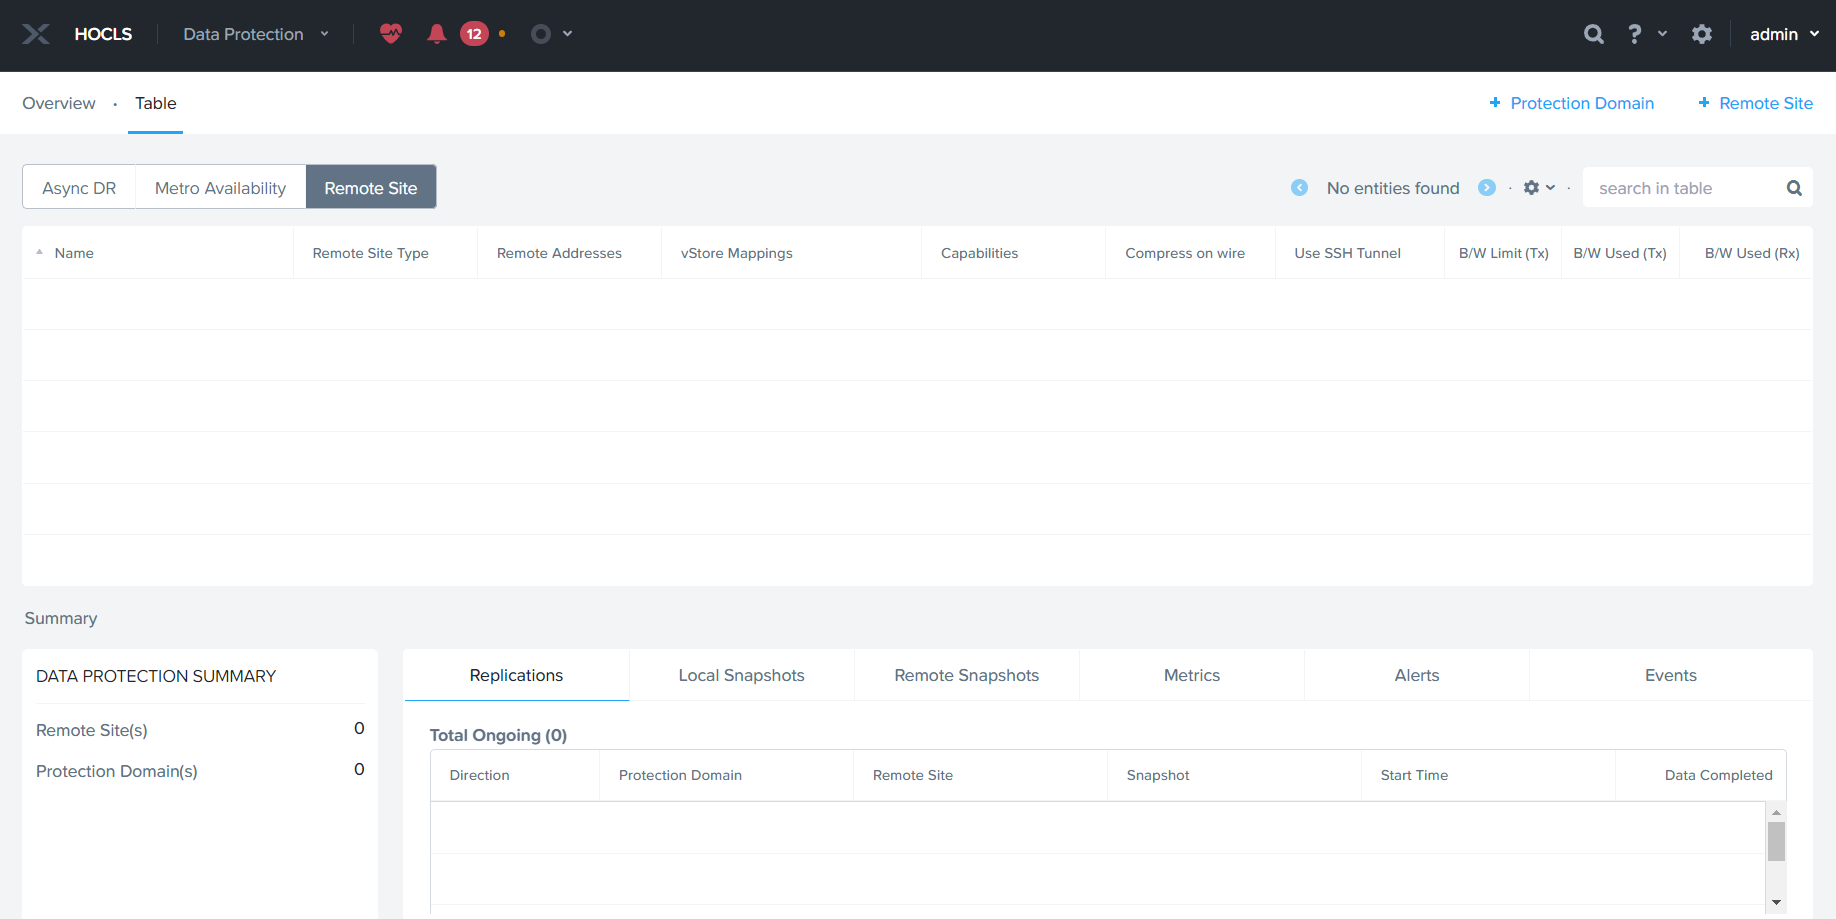
Click Remote Site à Physical Cluster

Specify Site Name and DR-Site Cluster Virtual IP , click add site to proceed.
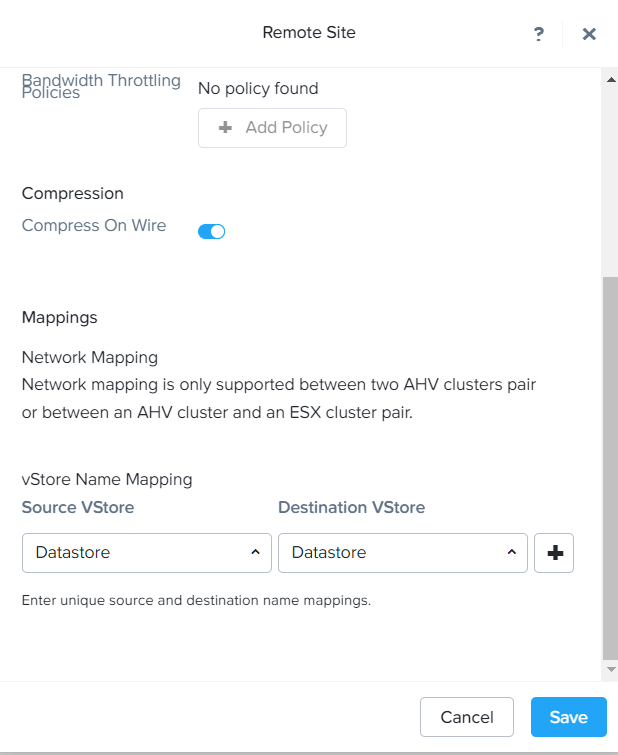
Specify Main-site & DR-Site Datastores and save
Note: For Metro both Source & Destination Datastore should have same names.

To Create the Meto Availability Protection Domain, Click Protection Domain à Meto Availability

Click Next

Specify the source storage container and click next

Specify the Target container and click next
Note: My both clusters have starter license, that’s why target is not getting listing. To setup meto adv. Replication license is required.
Now the storage container is in sync between the clusters.
