Nutanix AOS 6.10 LTS

AOS 6.10 is designed for both current and new Nutanix users. It meets the needs of organizations who demand the ability to run any workload now and in the future, without being constrained by IT silos. Let’s explore how this new release can help transform your IT landscape.

1) Unprecedented Storage Capabilities

AOS 6.10 combines faster, denser storage capabilities with superior performance from earlier releases. One of the bigger features in this storage category is the integration of AES Optimized Metadata from AOS 6.8. This feature enables higher performance, particularly sustained random access patterns that are common with high-end databases. This enhancement is crucial for businesses that manage large volumes of data and require quick access without sacrificing security or integrity.

Other new storage and data service features range from dedupe enhancements, capacity planning improvements, an optimized database solution, easier to use storage policies, and more.

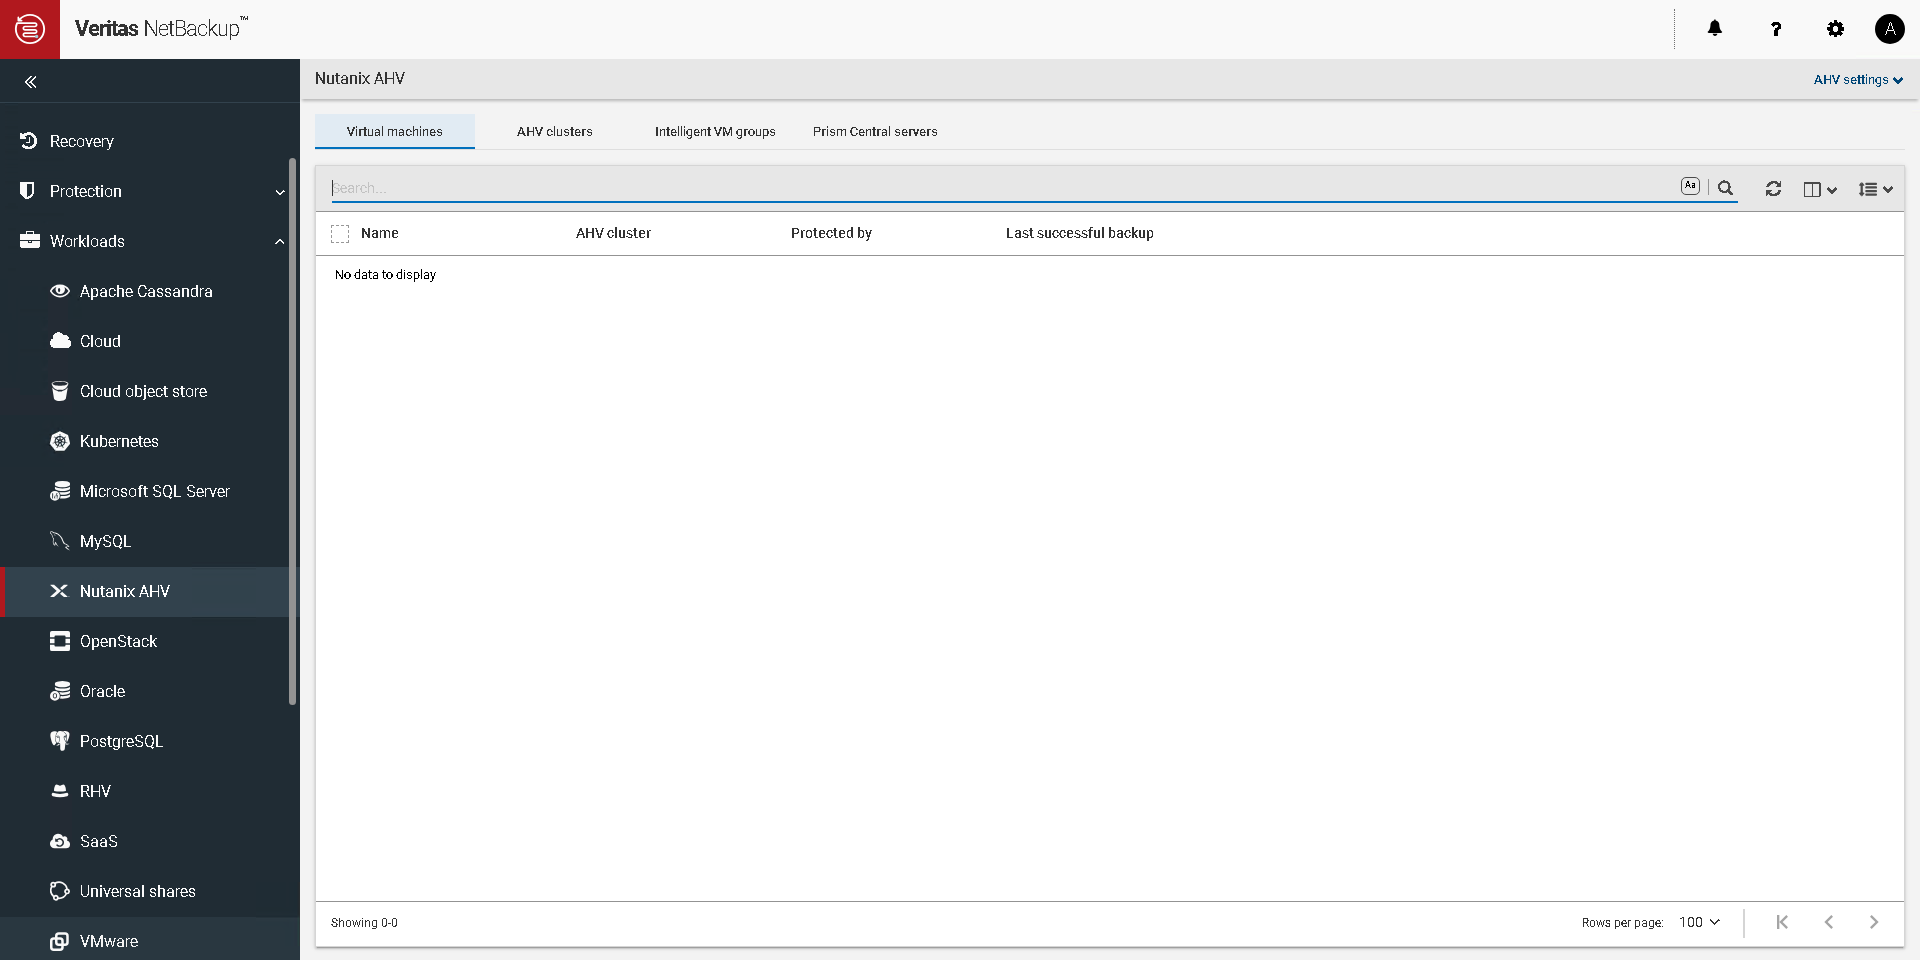
2) Nutanix AHV: Enterprise Readiness

The Nutanix AHV hypervisor in AOS 6.10 showcases the latest advancements in hypervisor technology and enterprise features. It includes on-demand cross-cluster migration, AOS storage optimizations, intelligent virtual machine (VM) placement, and robust security – all supported by an ever-growing partner ecosystem. This makes Nutanix AHV with AOS 6.10 the ideal choice for those seeking an alternative hypervisor, offering ease of use, functionality, and scalability.

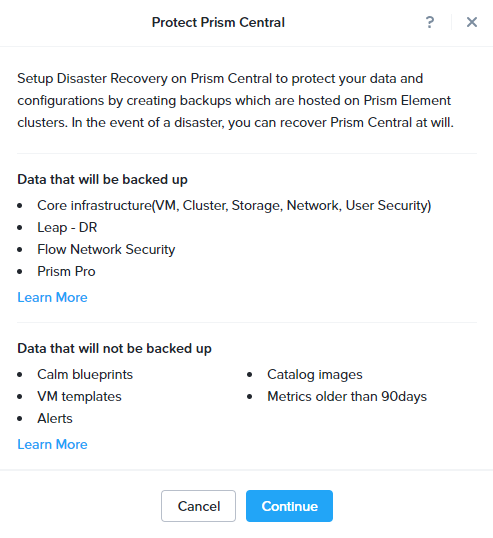
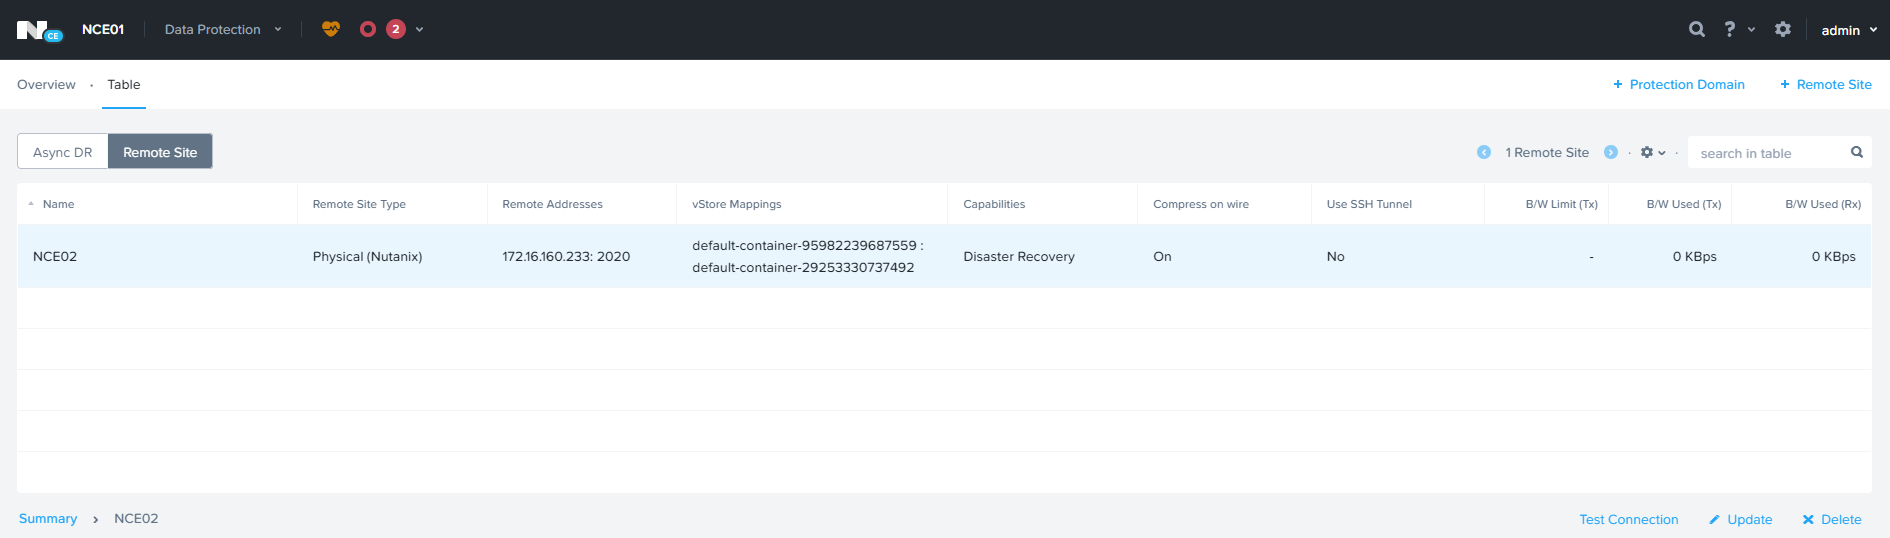
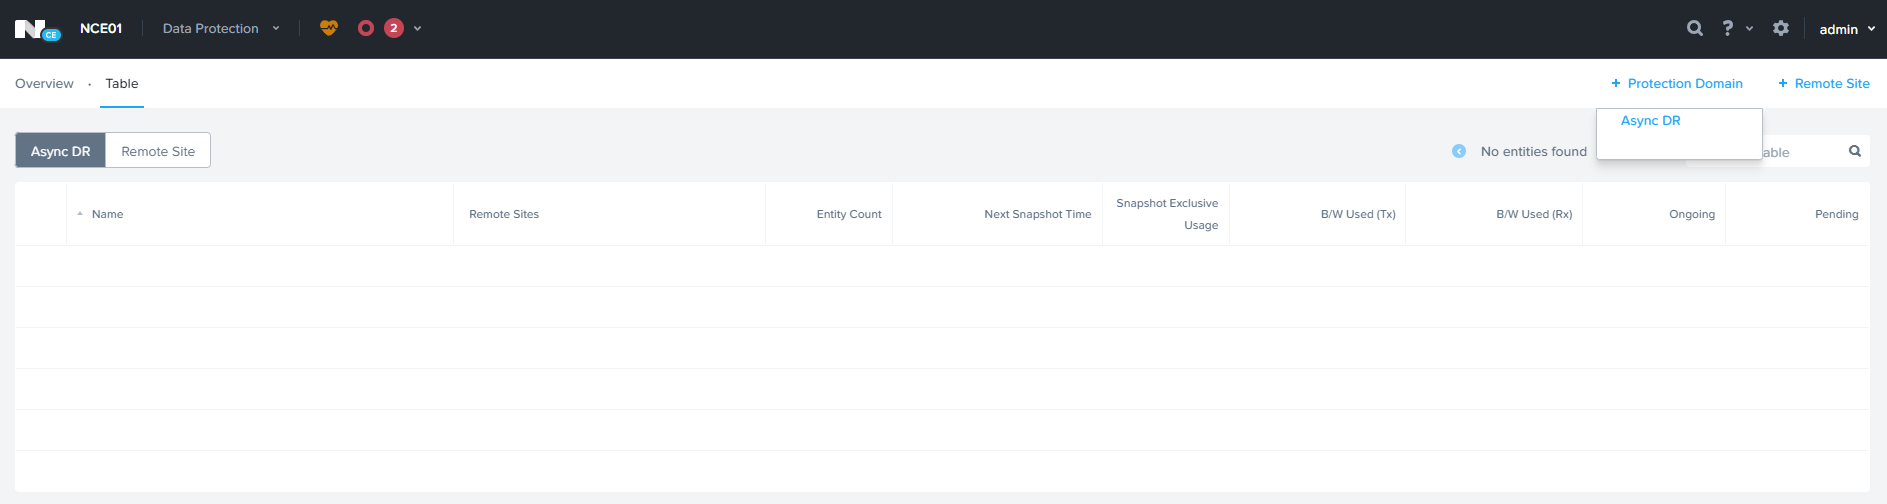
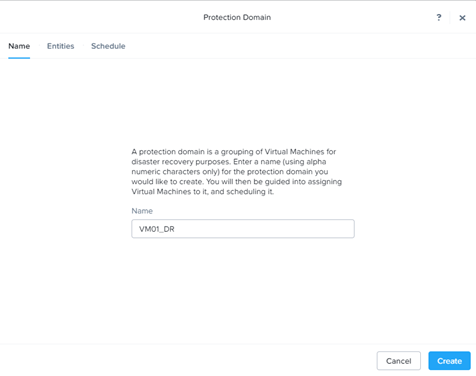
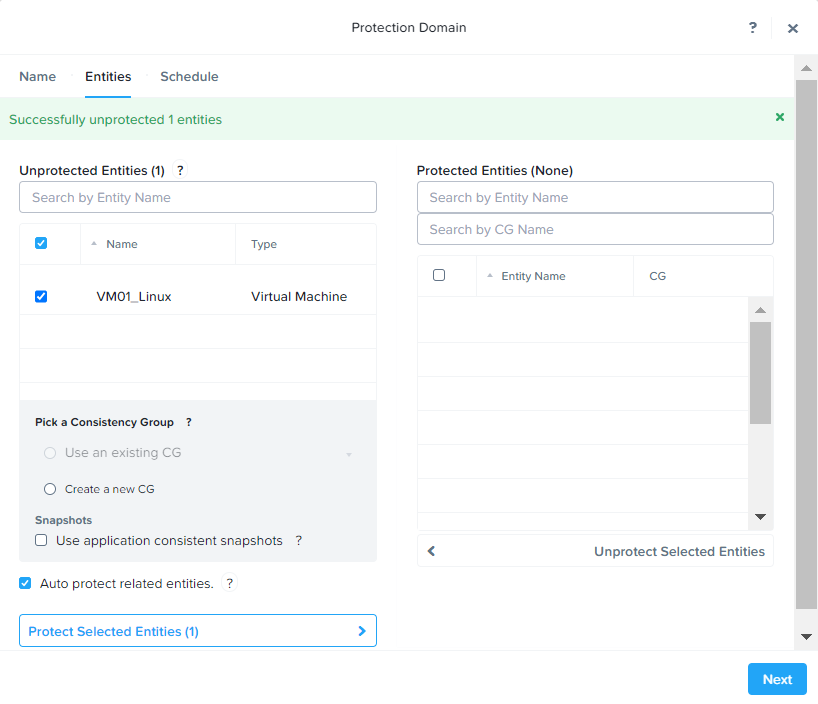
3) Disaster Recovery and Resiliency

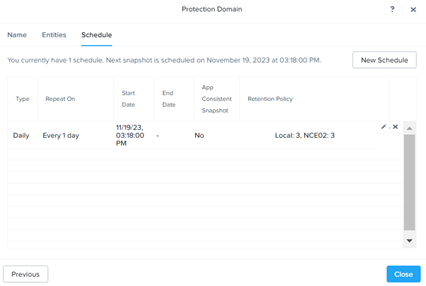
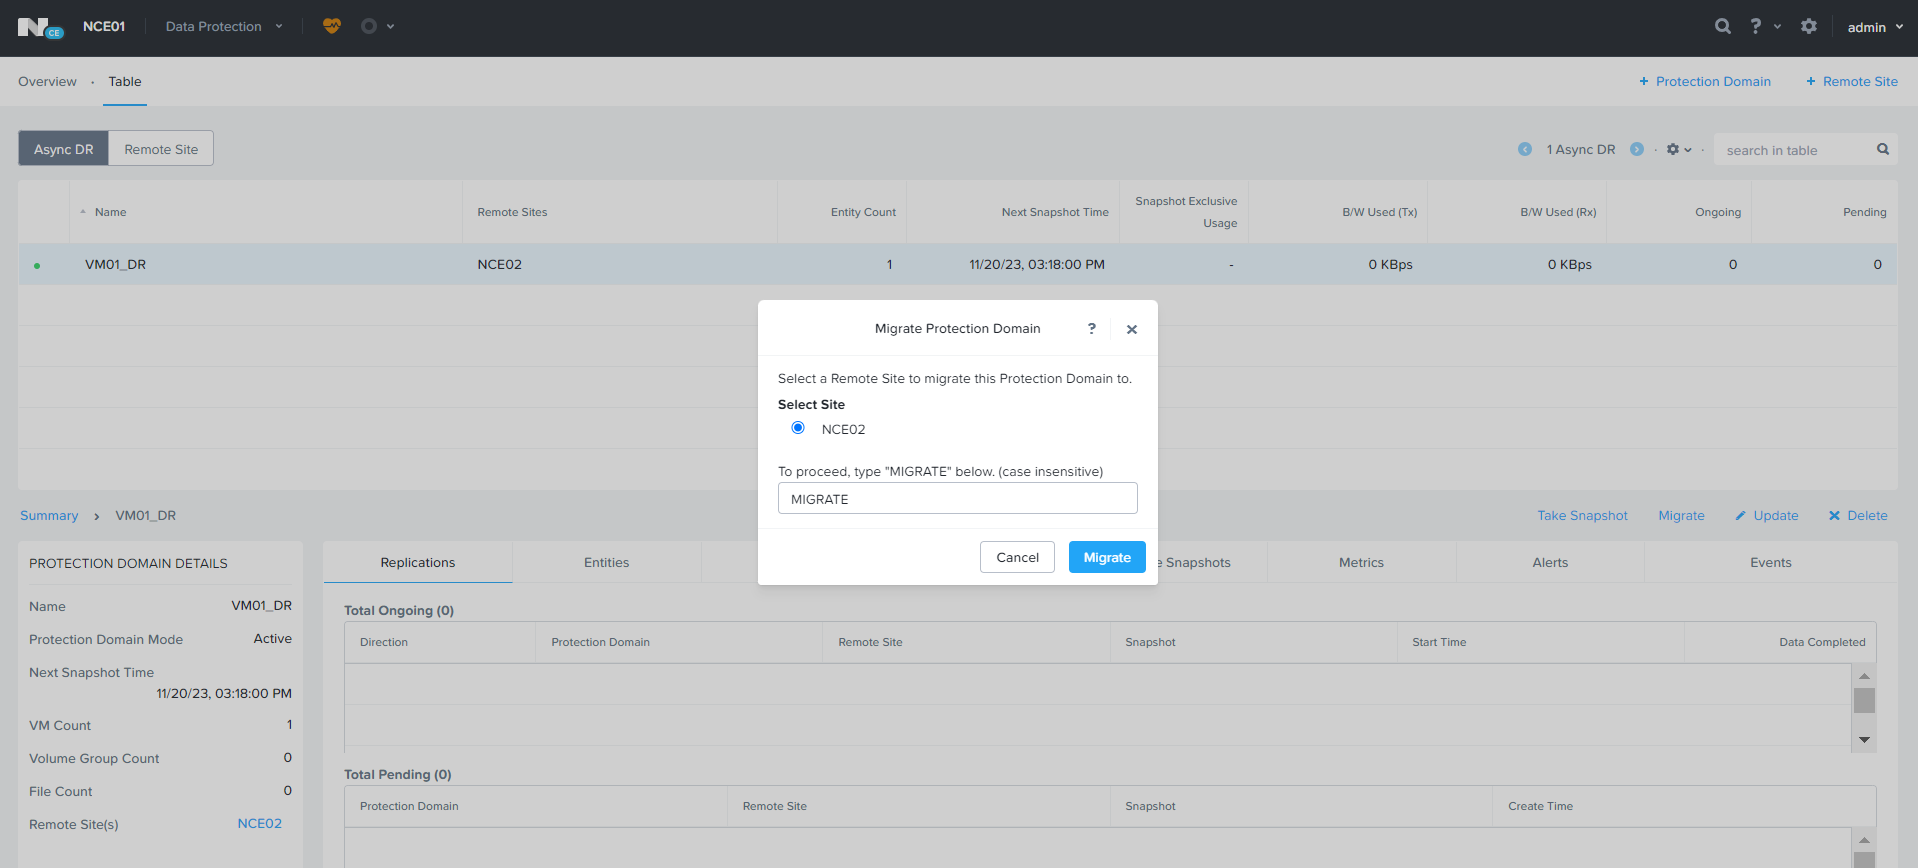
AOS 6.10 elevates Disaster Recover (DR) to new heights with a wide array of replication and resiliency options. It features NearSync for Volume Groups and Consistency groups, Metro-multi site DR, and significant enhancements for DR options.

For the first time, Multicloud Snapshot Technology (MST) with Pilot Light Deployment allows snapshots to be replicated directly to Amazon S3 cloud storage, enabling the ability to recover to a Nutanix Cloud Clusters (NC2) cluster when disaster strikes. These features ensure that your organization is well-prepared to handle any unforeseen events, maintaining operational continuity and safeguarding critical data.

4) Nutanix Flow Network Security offers Enhanced Security, Connectivity, and Cyber Resilience

AOS 6.10 introduces advanced security measures with the Flow Network Security solution and the Prism Central Security Dashboard feature, designed to protect your data, safeguard your network, and elevate the management of operational security. These enhancements ensure a more secure and resilient IT environment for your enterprise. For instance, the Prism Central Security Dashboard, introduced in AOS 6.6, provides a centralized overview of your infrastructure’s security posture.

Updates to networking and security for Flow Network Security Next Gen product and Flow Virtual Networking include traffic mirroring, easier policy management, and new ways to scale across clouds are now available in AOS 6.10. These updates simplify security management and fortify your network against evolving threats.

5) Streamlined Management and Automation

The AOS 6.10 update enhances management and automation by focusing on efficiency and user experience. This release introduces VM-centric data policies, new storage policies, and efficiency improvements with the X-Small Prism Central management console for smaller deployments.

Also, fine-grained role-based access control (RBAC), added in AOS 6.8, provides greater control over users’ access to specific resources. Furthermore, v4 APIs (Release Candidate) enable your organization to leverage a single family of industry-standard APIs to meet your objectives. Paired with the simplified Nutanix Guest Tools (NGT) installs, AOS 6.10 enables your IT teams to focus on strategic initiatives rather than routine tasks.

iNode issue in AOS 6.5.3

Today one of the Nutanix Customer called me saying their Nutanix Cluster was down. Upon checking noticed all cluster services were down. When tried to start the cluster Genesis logs pointed to insufficient disk space. On further inspection Linux File system on all CVM was at 100% usage for inodes.

nutanix@NTNX-XXXXXXX-XXXXX-B-CVM:192.168.X.XXX:~$ allssh df -i

================== 192.168.X.XXX =================

Filesystem Inodes IUsed IFree IUse% Mounted on

devtmpfs 4114406 434 4113972 1% /dev

tmpfs 4118255 1 4118254 1% /dev/shm

tmpfs 4118255 4036 4114219 1% /run

tmpfs 4118255 16 4118239 1% /sys/fs/cgroup

/dev/sda2 655360 655360 0 100% /

/dev/loop0 65536 230 65306 1% /tmp

/dev/sda3 2621440 99593 2521847 4% /home

tmpfs 4118255 1 4118254 1% /run/user/0

tmpfs 4118255 1 4118254 1% /run/user/1000

/dev/sdc1 244191232 811486 243379746 1% /home/nutanix/data/stargate-storage/disks/VGJ3VHSG

/dev/sdb1 244191232 813612 243377620 1% /home/nutanix/data/stargate-storage/disks/VGJ3XMZG

/dev/sda4 113278976 267907 113011069 1% /home/nutanix/data/stargate-storage/disks/S455NC0N900742

================== 192.168.X.XXX =================

Filesystem Inodes IUsed IFree IUse% Mounted on

devtmpfs 4114406 434 4113972 1% /dev

tmpfs 4118255 1 4118254 1% /dev/shm

tmpfs 4118255 4036 4114219 1% /run

tmpfs 4118255 16 4118239 1% /sys/fs/cgroup

/dev/sda2 655360 655360 0 100% /

/dev/loop0 65536 256 65280 1% /tmp

/dev/sda3 2621440 199946 2421494 8% /home

tmpfs 4118255 1 4118254 1% /run/user/0

tmpfs 4118255 1 4118254 1% /run/user/1000

/dev/sdc1 244191232 763959 243427273 1% /home/nutanix/data/stargate-storage/disks/VGJ6TR5G

/dev/sda4 113278976 301854 112977122 1% /home/nutanix/data/stargate-storage/disks/S455NC0N900734

/dev/sdb1 244191232 763815 243427417 1% /home/nutanix/data/stargate-storage/disks/VGJ6XASG

================== 192.168.X.XXX =================

Filesystem Inodes IUsed IFree IUse% Mounted on

devtmpfs 4114406 434 4113972 1% /dev

tmpfs 4118255 1 4118254 1% /dev/shm

tmpfs 4118255 4036 4114219 1% /run

tmpfs 4118255 16 4118239 1% /sys/fs/cgroup

/dev/sda2 655360 655360 0 100% /

/dev/loop0 65536 110 65426 1% /tmp

/dev/sda3 2621440 100851 2520589 4% /home

tmpfs 4118255 1 4118254 1% /run/user/0

tmpfs 4118255 1 4118254 1% /run/user/1000

/dev/sda4 113278976 261394 113017582 1% /home/nutanix/data/stargate-storage/disks/S455NA0N906186

/dev/sdc1 244191232 754575 243436657 1% /home/nutanix/data/stargate-storage/disks/VGJ6Y34G

/dev/sdb1 244191232 756298 243434934 1% /home/nutanix/data/stargate-storage/disks/VGJ3BGWG

This issue is already identified by known scenarios on version AOS 6.5.3. where the /var/spool/postfix/maildrop directory fills up the inodes.

Nutanix Tech note : https://portal.nutanix.com/kb/6082 can be referred for the same.

Basically, You have to run the below command will clear-up the files.

nutanix@NTNX-XXXXXXX-XXXXX-B-CVM:192.168.X.XXX:~$ allssh ‘sudo du –inode /var/spool/postfix/maildrop’

Confirm inode usage is Normal

nutanix@NTNX-XXXXXXX-XXXXX-B-CVM:192.168.X.XXX:~$ allssh df -i

================== 192.168.X.XXX =================

Filesystem Inodes IUsed IFree IUse% Mounted on

devtmpfs 4114406 434 4113972 1% /dev

tmpfs 4118255 1 4118254 1% /dev/shm

tmpfs 4118255 596 4117659 1% /run

tmpfs 4118255 16 4118239 1% /sys/fs/cgroup

/dev/sda2 655360 57441 597919 9% /

/dev/loop0 65536 237 65299 1% /tmp

/dev/sda3 2621440 99715 2521725 4% /home

tmpfs 4118255 1 4118254 1% /run/user/0

tmpfs 4118255 1 4118254 1% /run/user/1000

/dev/sdc1 244191232 811483 243379749 1% /home/nutanix/data/stargate-storage/disks/VGJ3VHSG

/dev/sdb1 244191232 813592 243377640 1% /home/nutanix/data/stargate-storage/disks/VGJ3XMZG

/dev/sda4 113278976 267565 113011411 1% /home/nutanix/data/stargate-storage/disks/S455NC0N900742

================== 192.168.X.XXX =================

Filesystem Inodes IUsed IFree IUse% Mounted on

devtmpfs 4114406 434 4113972 1% /dev

tmpfs 4118255 1 4118254 1% /dev/shm

tmpfs 4118255 596 4117659 1% /run

tmpfs 4118255 16 4118239 1% /sys/fs/cgroup

/dev/sda2 655360 57443 597917 9% /

/dev/loop0 65536 267 65269 1% /tmp

/dev/sda3 2621440 200108 2421332 8% /home

tmpfs 4118255 1 4118254 1% /run/user/0

tmpfs 4118255 1 4118254 1% /run/user/1000

/dev/sdc1 244191232 763957 243427275 1% /home/nutanix/data/stargate-storage/disks/VGJ6TR5G

/dev/sda4 113278976 301781 112977195 1% /home/nutanix/data/stargate-storage/disks/S455NC0N900734

/dev/sdb1 244191232 763813 243427419 1% /home/nutanix/data/stargate-storage/disks/VGJ6XASG

================== 192.168.X.XXX =================

Filesystem Inodes IUsed IFree IUse% Mounted on

devtmpfs 4114406 434 4113972 1% /dev

tmpfs 4118255 1 4118254 1% /dev/shm

tmpfs 4118255 596 4117659 1% /run

tmpfs 4118255 16 4118239 1% /sys/fs/cgroup

/dev/sda2 655360 57430 597930 9% /

/dev/loop0 65536 118 65418 1% /tmp

/dev/sda3 2621440 100257 2521183 4% /home

tmpfs 4118255 1 4118254 1% /run/user/0

tmpfs 4118255 1 4118254 1% /run/user/1000

/dev/sda4 113278976 261402 113017574 1% /home/nutanix/data/stargate-storage/disks/S455NA0N906186

/dev/sdc1 244191232 754575 243436657 1% /home/nutanix/data/stargate-storage/disks/VGJ6Y34G

/dev/sdb1 244191232 756298 243434934 1% /home/nutanix/data/stargate-storage/disks/VGJ3BGWG

Restart genesis service on all cluster:

nutanix@NTNX-XXXXXXX-XXXXX-B-CVM:192.168.X.XXX:~$ cluster restart_genesis

Start Cluster:

nutanix@NTNX-XXXXXXX-XXXXX-B-CVM:192.168.X.XXX:~$ cluster start

Once Cluster/inode usage is normal, upgrade the AOS latest release to avoid any future issues.

Hope this helps 😊

Nutanix End User Computing Administration (NEUCA) 6.5 & Free Exam

Nutanix End User Computing Administration (NEUCA) course to v6.5. This free, self-paced online course teaches you the skills needed to design, install, configure, and manage an End-User Computing (EUC) solution on Nutanix.

In this 10-hour course, you will explore several EUC-focused subjects including:

  • Considerations when planning an EUC implementation, how to choose between Virtual Desktop Infrastructure (VDI) and Desktop-as-a-Service (DaaS), and the options available when designing your EUC solution.
  • Nutanix technologies that support an EUC deployment, including Flow Network Security, which provides increased security for desktops, and Files Storage, an integrated file server solution.
  • Configuring and operating EUC environments, including using third-party solutions, working with profile stores, and creating and optimizing gold images.
  • Optimizing and troubleshooting an EUC environment, including best practices, viewing utilization metrics, and troubleshooting various common issues.

Visit our website to learn more about the course and get started.

After you’ve completed the course, validate your skills with the Nutanix Certified Professional – End User Computing (NCP-EUC) v6.5 certification exam.

The NCP-EUC 6.5 certification exam measures your ability to successfully deploy, monitor, administer, troubleshoot and maintain end user computing environments utilizing the Nutanix platform.

For a limited-time you can take the certification exam for free (a $199 value)! Use discount code NXFREUC65 at checkout by Thursday, December 28, 2023.

Nutanix Move

Nutanix Move is a cross-hypervisor migration tool to migrate Virtual Machines workload to Nutanix & File Server to Nutanix Files. Below are the Supported Migration scenarios.

  • VMware ESXi (legacy infrastructure or Nutanix) to AHV
  • VMware ESXi (legacy infrastructure or Nutanix) to VMware ESXi on Nutanix
  • VMware ESXi to Nutanix Cloud Clusters (NC2) on AWS
  • VMware ESXi to NC2 on Microsoft Azure
  • Microsoft Hyper-V to AHV
  • Microsoft Hyper-V to VMware ESXi on Nutanix
  • Microsoft Hyper-V to NC2 on AWS
  • AWS EC2 to AHV
  • AWS EC2 to VMware ESXi on Nutanix
  • AWS EC2 to NC2 on AWS
  • Microsoft Azure Cloud to AHV
  • Microsoft Azure Cloud to VMware ESXi on Nutanix
  • Microsoft Azure Cloud to NC2 on Azure
  • Nutanix AHV to Nutanix AHV
  • Nutanix AHV to AWS EC2
  • Nutanix AHV to Microsoft Azure Cloud

Nutanix Move Can be downloaded from the link below.

https://portal.nutanix.com/page/downloads?product=move

Move VM Specifications:

  • vCPU: 2
  • Memory: 8GB
  • Storage: 50G

Move VM initial Configuration:

Create VM based downloaded Move OS image.

Login to Move VM with default credentials

  • User: admin
  • Password: Nutanix/4u

If you want to configure Static IP, press Y and enter.

Specify the IP Adress, Netmask, Gateway, DNS and domain and enter. Once IP is configured. Move can be accessible from any web browser.

Accept the license agreement and click continue

Set Web password

Add Environment Information

Select the Source Environment (VMware / Hyper-v / Azure etc)

Provide environment name, IP address, Username , Password and click add

Nutanix Target (AHV /VMware) will be added as Nutanix AOS. Provide Nutanix Cluster IP, username and password and click ADD.

Create Migration Plan

Click Create a Migration Plan.

Select the Source , Target and Target Container and click Next

Select the Desire and Click + to add. Click next to proceed.

Specify the target network and click next to proceed.

In the manual Preparation method, based on the OS type above mentioned commands need to be run manually.

Provide Guest VM Admin permission to do the Automatic VM preparation and click next.

Review the configuration and click Save to start the migration.

During the Sync Process, Move will take the Source VM snapshot and sync the snapshot to target.

Once the Sync is completed, job status will be shown as Ready to Cutover.

Select the VM and Click Cutover. During cutover Source VM will be shutdown and final sync will be initiated. Source VM NIC will be disconnected and New VM will be registered in Nutanix and powered-on

Nutanix Prism Central – Deployment , Registration and Unregistration

Nutanix Prism Central provides an option to monitor and manage multiple clusters through a single web console. Centralized management tool runs as a separate instance it can be a single VM or a set of VMs.

Prism Central offers following features:

  • Single sign on for registered cluster
  • Dashboard Customization
  • Manage VMs, storage containers, catalog items, images, categories, recoverable entities, and subnets across the registered clusters.
  • Mange Nutanix Disaster Recovery & Nutanix Flow
  • Hardware component
  • Activity monitors for alerts, events, audits, and tasks
  • Tools to analyze system activity, plan for resource needs, create usage reports, and automate routine administrative tasks
  • Dashboards to manage inventory (LCM), projects, roles, users, and availability zones.
  • Service connection pages to enable Calm, Karbon, and Objects

Deploy Prism Central

We can deploy Nutanix Prism Deploy from any cluster with 1-Click operation. Log-in to cluster

Home Page — > Prism Central Widget — > Register or Create New

Click Deploy to Start the Deployment Wizard

Select the Desire PC Version and click next.

Select the PC Deployment Model and Click Next

Specify the Network, Subnet, Gateway and PC IP and click Next

Review the Deployment summary & Click Deploy to start the PC Deployment.

This will take approximately 30 minutes to complete. After task completion we can login to Prism Central using default credentials.

Update the password.

Specify the name and accept the agreement.

Enable Pulse and click continue

Register Cluster with Prism Central

Home Page — > Prism Central Widget — > Register or Create New

Click Connect

Click Next to Continue

Specify the Prism Central IP , Username and Password and click Connect

Prism Central Disaster Recovery

To Prism Central Disaster Recovery. Browse to Setting — > Prism Central Management

Click Protect Now under Disaster Recovery

Click Continue

Select the available Cluster where you want to sync and click proceed.

Unregister Cluster from Prim Central

  • Login to any CVM
  • Run Cluster Status and verify the Services.
  • Unregister the cluster from Prim Central
    nutanix@cvm$ ncli multicluster remove-from-multicluster external-ip-address-or-svm-ips=pc-name-or-ip username=pc-username password=pc-password force=true
  • Confirm Unregistration is complete using below command, if command output does not include the cluster details, it means that the unregistration is successful.
  • nutanix@cvm$ ncli multicluster get-cluster-state
  • Get UUID for the cluster
    nutanix@cvm$ ncli cluster info
  • Login to Prism Central and run the clean-up on prism central
    python /home/nutanix/bin/unregistration_cleanup.py uuid

Configuring Nutanix Data Protection (Legacy Protection Domain)

In this article we will discuss Legacy Nutanix Data Protection.

LAB Environment: 2 X Nutanix CE Single Node Cluster

Login to Primary Cluster: https://CVM_IP:9440

Data Protection

Click on Table View — > Remote Site

Click Remote Site à Physical Cluster

Enter Remote Site Name & Remote Cluster IP

Specify the Source & Target Network Mapping and Datastore Mapping and click Save.

ADD remote Site on the 2nd cluster.

Click Protection Domain — > Async DR

Click Create

Select VM and Click Protect Selected Entities to add for protection.

Click Next to Continue

Click New Schedule to add the Schedule.

Specify the Snapshot frequency & Retention policy for local & Remote Cluster

Click Close

Planned Failover:

From Active Site, Select the Protection Domain — > Migrate

Type Migrate and Click Migrate for Migration.

Migration Task will be created, it will take 1-2 minutes to complete. During the process VM will be shutdown from active site and deregistered from active site and registered to the Remote Site.

Initally Active on NCE01 Cluster

Migrated to NCE02

Configuring CVM Memory

Sometimes we need to increase the CVM Memory to enable Advanced functionality like Compression, Deduplication, or performance issues.

Memory can be increased from PRISM UI. Setting –> Configure CVM

Specify the desire memory and click Apply. CVM reboot task will be scheduled for all CVMs and memory will be updated.

Memory Increase / Decrease from CLI

Login to AHV host with SSH

List all Virtual Machines on the AHV host.

[root@NTNX-b8c39436-A ~]# virsh list –all

Shutdown the CVM, SSH to CVM

Login to CVM

nutanix cvm_shutdown -P now

Modify the CVM Virtual Machine

nutanix virsh setmaxmem cvm_name –config –size 24GiB

nutanix virsh setmem cvm_name –config –size 24gbGiB

Start CVM Virtual Machine

[root@NTNX-b8c39436-A ~]# virsh list –all

[root@NTNX-b8c39436-A ~]# virsh start cvm_name(get the name from above command)

Veritas NetBackup Integration with Nutanix AHV for Virtual Machines Backup

Veritas NetBackup Supports Nutanix AHV Virtual Machines Backup. In the below article will discuss how we can integrate Nutanix & Veritas NetBackup.

Establishing communication between NetBackup and Nutanix AHV

  • The NetBackup master server, media server needs to establish communication with the Nutanix Acropolis cluster through a backup host to complete a backup or restore job.

Configuring communication between the Nutanix Acropolis Hypervisor server and NetBackup host

we can go with secure or unsecure communication for the backup.

  1. Unsecure communication between Nutanix AHV & NetBackup Host.

Disable SSL Validation in nb_nutanix-ahv.conf

/usr/openv/netbackup/nb_nutanix-ahv.conf

{ “enable_ssl_validations”:false, “cert_authority_file”:””}

Default is True to keep SSL enabled, False to disable SSL

  1. Secure communication between Nutanix AHV & NetBackup Host.
    1. Use the openssl s_client -connect <Nutanix Cluster FQDN>:9440 -showcerts < /dev/null command from a Linux system to obtain the Nutanix certificates.
    2. Scroll to the end of the results and copy the last certificate which starts from:
      —–BEGIN CERTIFICATE—–
      <Certificate>
      —–END CERTIFICATE—–
    3. Paste the information to a text file and then rename it as <certificate file name>.pem and copy it to a path to your backup host. Recommended path “/usr/openv/netbackup
    4. Enter the PEM file path ECA_TRUST_STORE_PATH=/usr/openv/netbackup/<certificate file name>.pem in the bp.conf on the backup host.
Use the nbsetconfig command to configure the following NetBackup configuration options on the access host.
ECA_TRUST_STORE_PATH
Specifies the file path to the certificate file that contains all trusted root CA certificates.
ECA_CRL_PATH Specifies the path to the directory where the certificate revocation lists (CRL) of the external CA are located.
VIRTUALIZATION_HOSTS_SECURE_CONNECT_ENABLED This option affects AHV, RHV, and VMware secure communication. Without this option, each workload and plug-in separately determine the secure or the insecure communication.Disabling this option lets you skip the security certificate validation. It is recommended by NetBackup that secure communication should be enabled using the ECA_TRUST_STORE_PATH option.
VIRTUALIZATION_CRL_CHECK Let you validate the revocation status of the virtualization server certificate against the CRLs. By default, the option is enabled.

Whitelist NetBackup backup host IPs on Nutanix.

Adding Nutanix Cluster in NetBackup Console

Create AHV Protection Plan:

  • Create Protection plan for AHV Backup, Protection à Protection Plan
  • Click Add to add the new Protection plan.
  • Specify the Protection Plan, Select the Workload and Click Next
  • Create the Desire backup schedule & Specify the Backup retention.
  • Click Next to continue.
  • Specify the Backup Destination Storage and click Select to continue.
  • Click Next to Continue
  • Specify the user if you want to enable the RBAC
  • Click Next to Continue, review the configuration and click Finish.

Add AHV Cluster:

  • Expand workload à Nutanix AHV
  • Click on AHV Cluster to add the AHV Cluster
  • Click Start
  • Specify Nutanix Cluster IP, Specify Backup host and add a new credential.
  • Specify the Credential name, username, password for Nutanix Cluster and click next
  • AHV Cluster is added in NetBackup & AHV VMs will be discovered under Virtual Machines Section.

Assign AHV VMs to Protection Plan:

  • Workload à Nutanix AHV à Virtual Machines
  • Select Virtual Machine and click Add Protection to assign VM to Protection Plan.
  • Select Protection Plan and click Next to continue.
  • Click Close

Nutanix Common Commands

In Today’s article will look at some of the common Nutanix CLI Commands you must know. Commands listed below are some of the most useful and most frequently used Nutanix CLI commands.

How to Start Nutanix Cluster

To Start the Nutanix Cluster you need to run the below command on any of the CVM.

nutanix@NTNX-b8c39436-A-CVM:~$ cluster start

How to Stop Nutanix Cluster

To Stop the Nutanix Cluster you need to run the below command on any of the CVM.

nutanix@NTNX-b8c39436-A-CVM:~$ cluster stop

How to Check Nutanix Cluster Status

To check the Nutanix Cluster status need to run the below command on any of the CVM.

nutanix@NTNX-b8c39436-A-CVM:~$ cluster status

output will be as below.

How to get Nutanix Cluster Info

To get the Nutanix Cluster information need to run the below command on any of the CVM.

nutanix@NTNX-b8c39436-A-CVM:~$ ncli cluster info

How to get all Host IP Address in the Cluster

To get all hosts IP Address in the Cluster you need to run the below command on any of the CVM.

nutanix@NTNX-b8c39436-A-CVM:~$ hostips

How to get all CVM IP Address in the Cluster

To get all CVM IP Address in the cluster you need to run the below command on any of the CVM.

nutanix@NTNX-b8c39436-A-CVM:~$ svmips

How to Check if Hypervisor Upgrade State

To Check the Hypervisor(AHV, VMWare) Upgrade State, you need to run the below command.

nutanix@NTNX-b8c39436-A-CVM:~$ host_upgrade_status