Hi,
Below is the procedure to perform Rubrik BMR (Volume Restore) on Physical / Virtual. Before starting the restore details please upgrade the CDM 4.2 to latest available as from CDM5.0 there major changes and enhancements related to Windows Volume backup / BMR Restore.
Supported Operating System:
- Windows Server 2012
- Windows Server 2012 R2
- Windows Server 2016
- Windows Server 2019
Requirements:
- Microsoft Windows PE Bootable CD required to initiate the Restore Process
I have created the WINPE ISO which can be used to initiate restore on VMware/Hyper-V VM, you can download it from below link.
https://access.jouddrive.com/portal/s/0202101780743208790
Incase if you want to create WINPE ISO for Physical Server with Custom Raid Storage Drivers, Please use the below link
https://support.rubrik.com/s/article/000001905
Restore Procedure:
Step 1: Mount the Windows Volume you want to restore
Step 2: Initiate the Restore from WinPE
STEP 1: Mount Windows Volume for Restore:
- Browse the Windows Host for Select the Snapshot to restore

- Select Mount the Volume

- Select the Volume to Restore and click next

- Select no host and click next

- Specify Domain, username used during setting up SMB Security and Client IP Address you will be using in Restore Client during Boot. And click Finish.

- Mounted Volume will be available in live Mount à Windows Volume
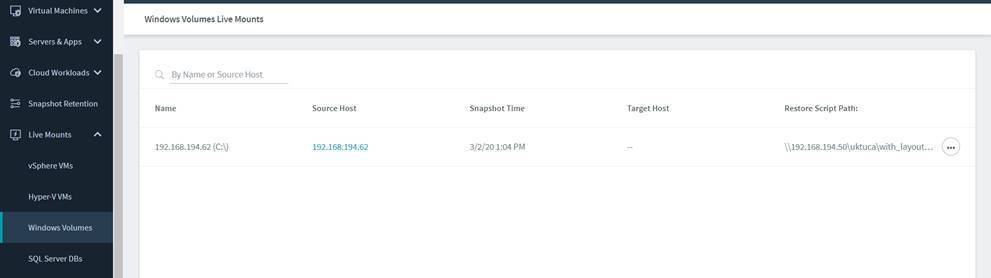
- Move the mouse pointer on Mounted Volume and copied the SMB path, required during restore process. In our case below is the SMB path.
\192.168.194.50uktucarubrik-ca6de0d9-5d29-4900-8c85-23a291ab4e30.vhdx
Step 2: Initiate the Restore from WinPE
- Boot from WinPE ISO
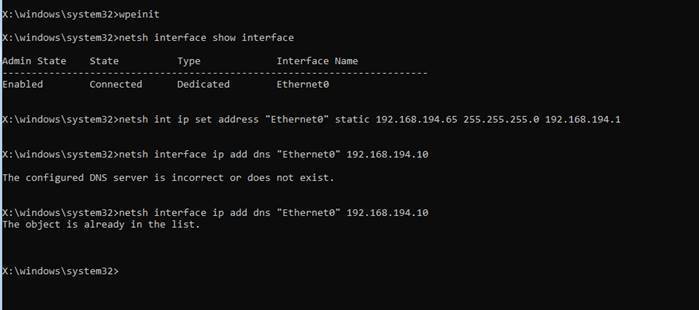
- Set IP Address on booted VM incase if DHCP is not available , if DHCP is available please skip to next step.
List all interface names
netsh interface show interface
Set Static IP
netsh int ip set address “Ethernet0” static 192.168.194.65 255.255.255.0 192.168.194.1
Set DNS
netsh interface ip add dns “Ethernet0” 192.168.194.10
- Browse to X:Utilities and run below command to start the BMR Restore script from Powershell and follow the Script steps.
.RubrikBMR.ps1 -Operation bmr
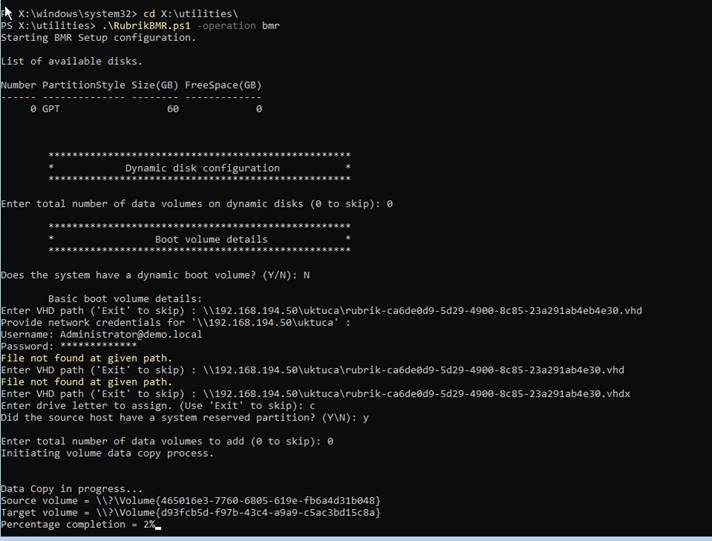
- Wait for restore finish, once 100% restore done. Press Y to reboot the PC
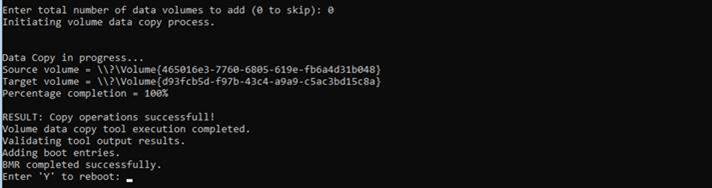
- Once system is boot confirm, restored disks and reip the Server

Notes:
- Local Admin Account password is required to logon on the restored System as you may not be able to use Domain Account for login
- Customer WinPE may need to be created in case of Physical Restore with Proper RAID Controller Drivers.
Any Suggestions and Comments are Welcome, please share the feedback or comment if any.
Best Regards,
Qamar Abbas